Congratulations on installing Author Signature. Without doubt the simplest and most feature rich app available to manage your Author Signature and Guest Authors!
The purpose of the article is provide guidance on getting your Authors and their Signatures setup within the app.
Basics
When you launch the application it will gather all the existing Authors you have assigned and present them in the dropdown here.
Simply select any Author you want to set details and styling from the Drop Down.

This will now load all the editable author details into the boxes below. The Vintage settings are only viewable and usable for Themes with a vintage/legacy style install. This will be phased out in the future.

To get started simply add bio text to your author - this is a great option to demonstrate the relationship of the author to the article subject matter or readers
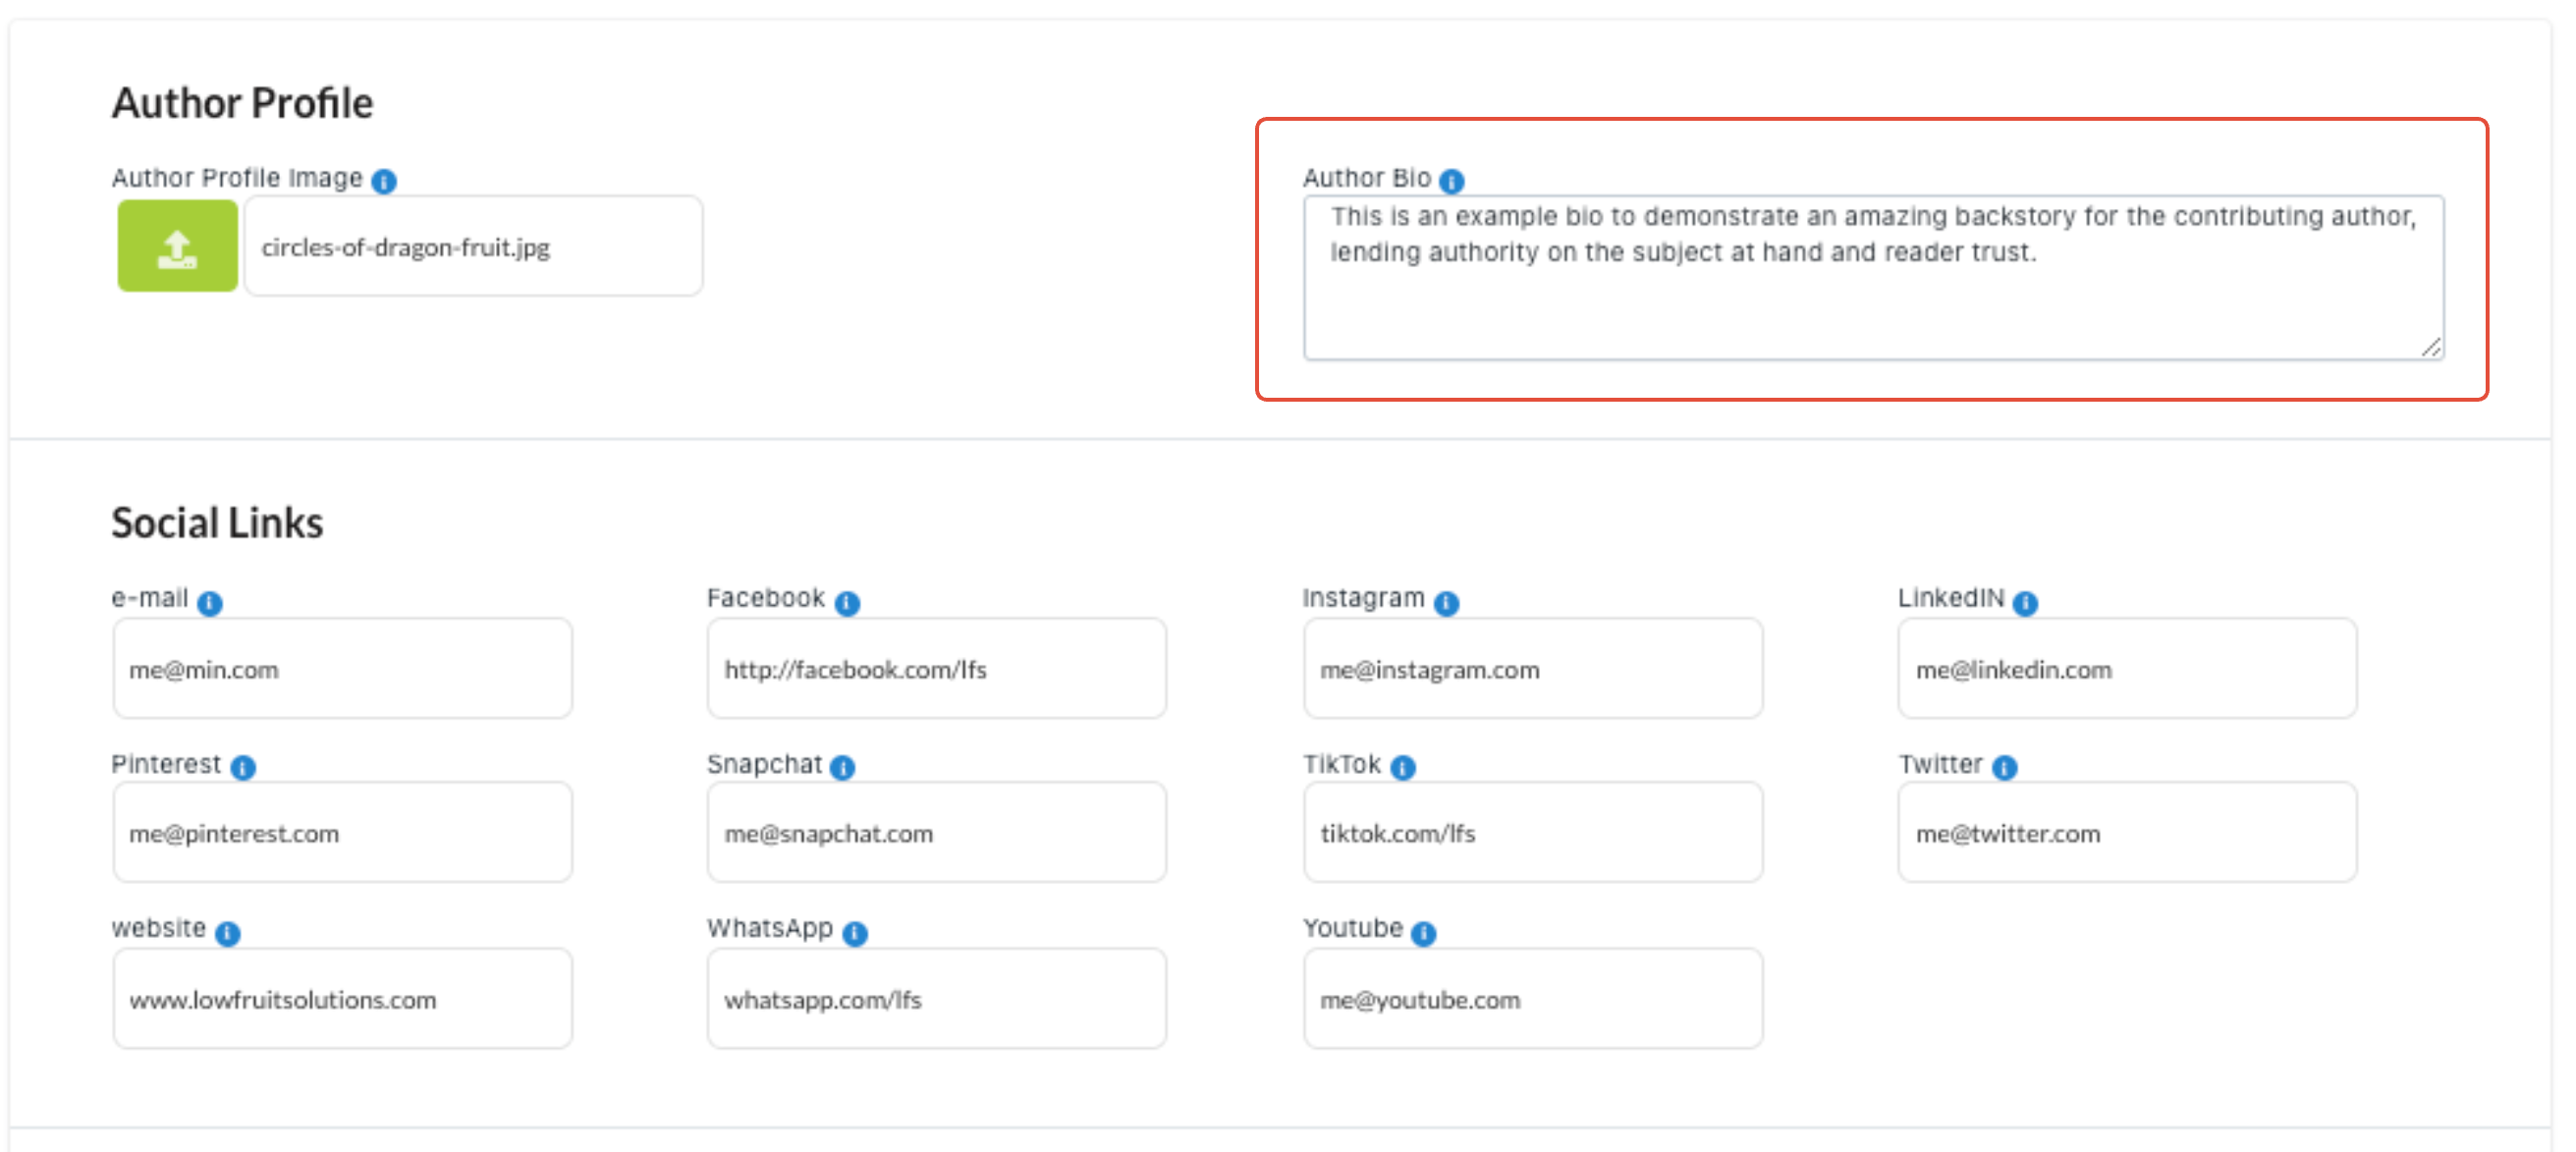
Humans are visual creatures - use the Author Profile Image to show an avatar/logo or image of the Author. Viable formats are: standard image files, a URL to an image on the internet or the e-mail address linked to your Gravatar account. Clicking the upload button will help load your image file of choice to the Shopify CDN

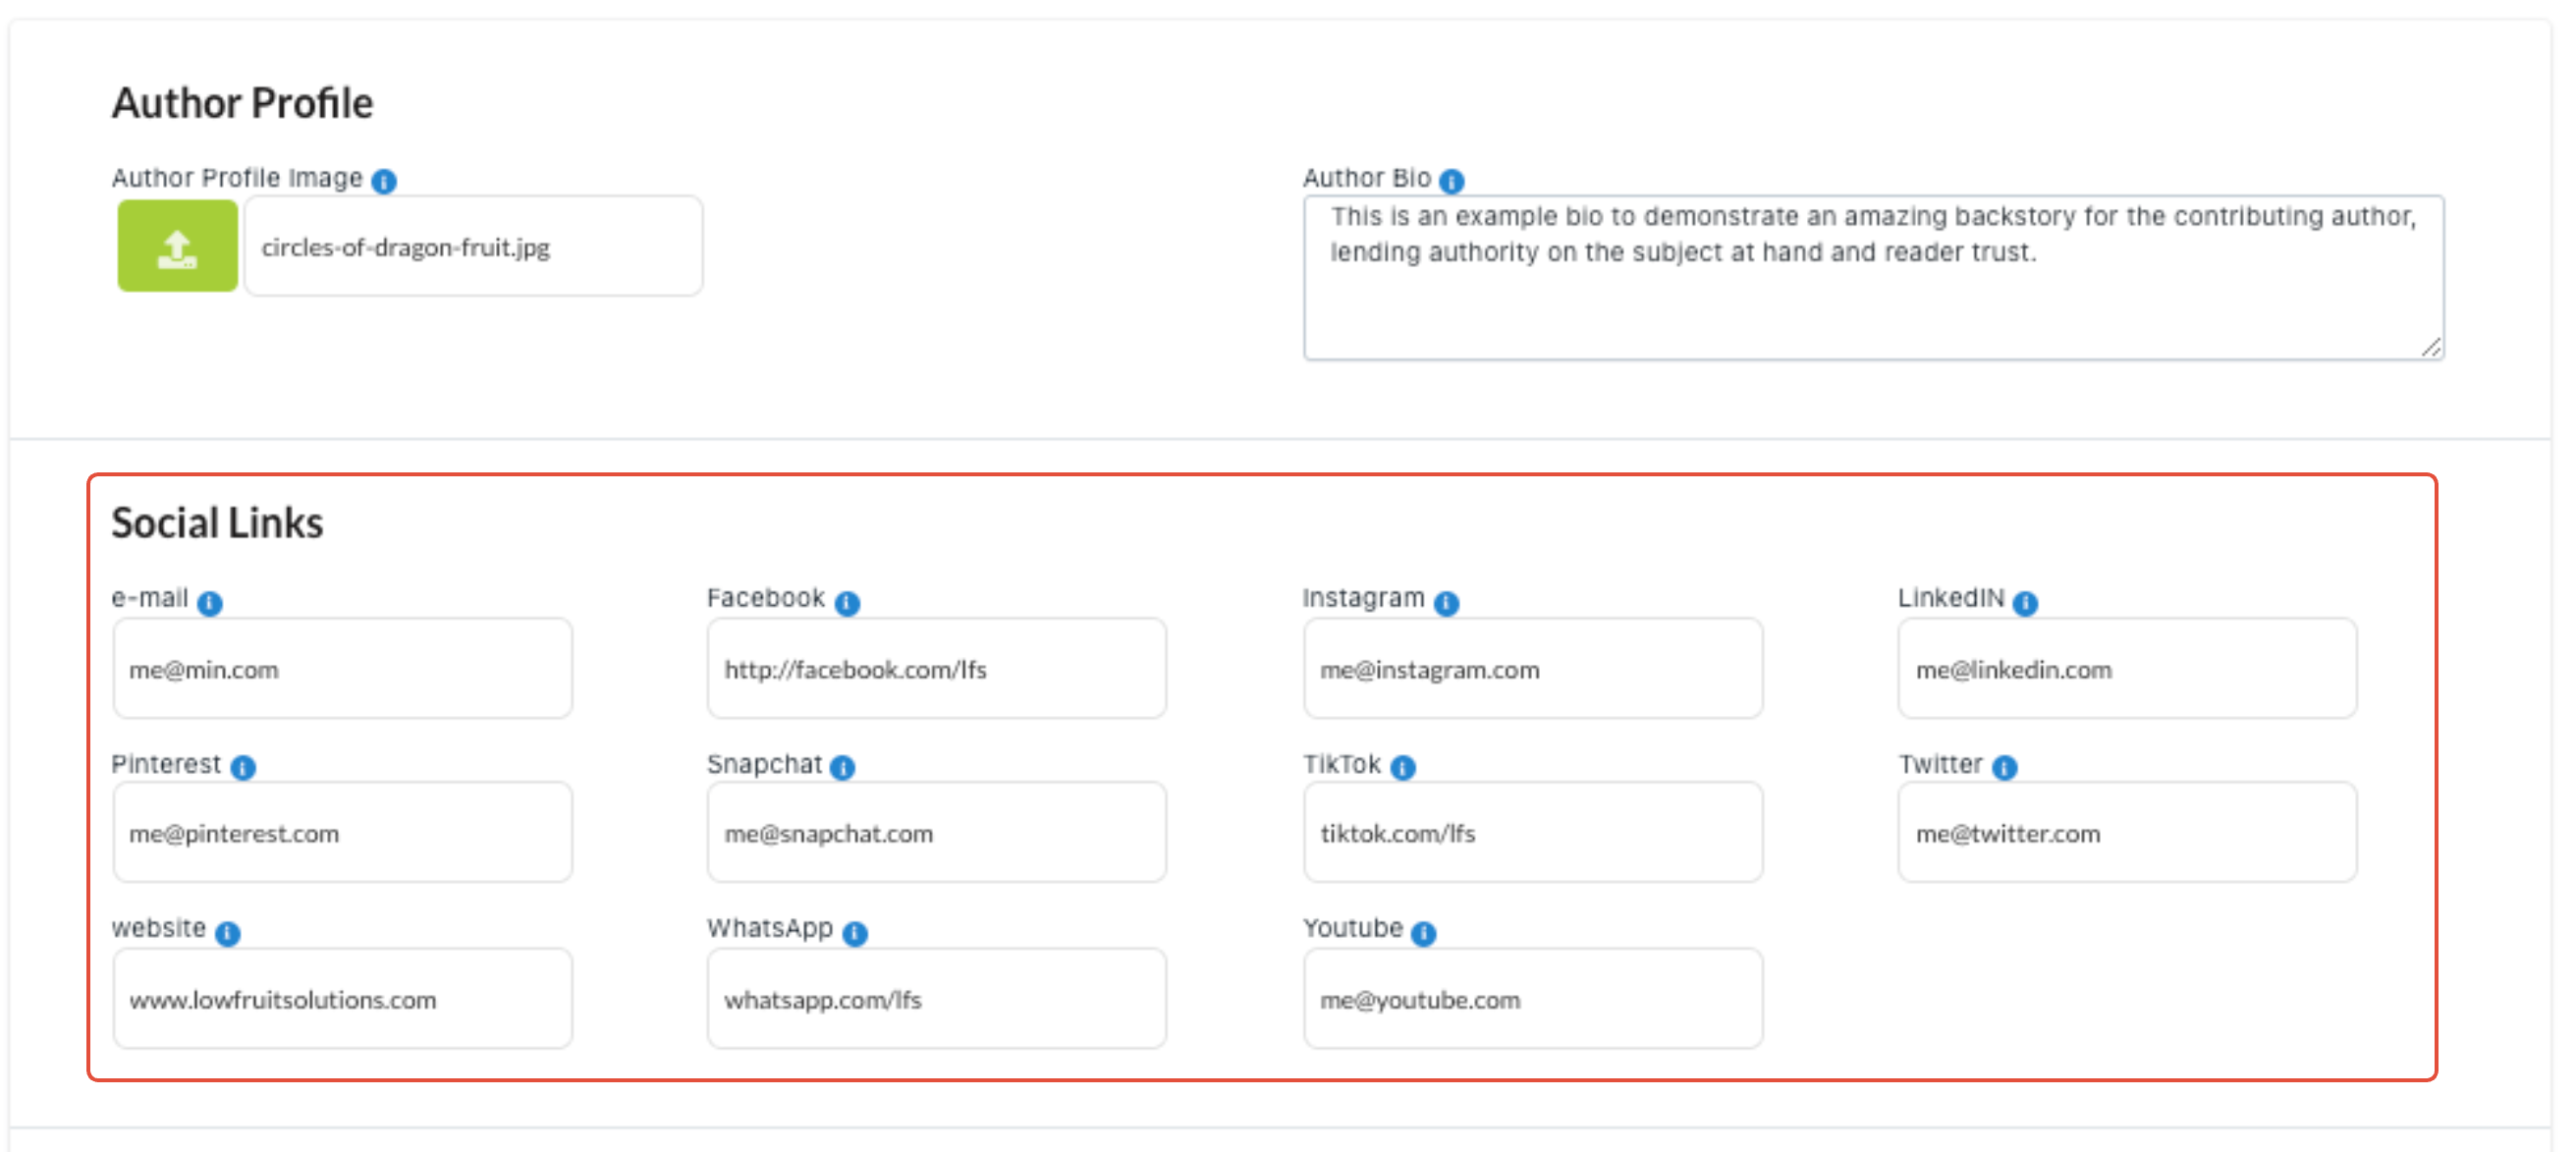
Social network options will provide back links to your guest authors blogs/feeds and act as a nice counter balance to their contribution to your sites content. This is also what defines what social icons are displayed on the author signature features.
Click on Save to write the settings back

Vintage Install Only
The following section is for vintage install management only. These settings will not be displayed unless your theme is vintage or you have an existing vintage install.
All these settings and more are available via the Theme Customisation options for the Author Signature application block for OS2 themes.
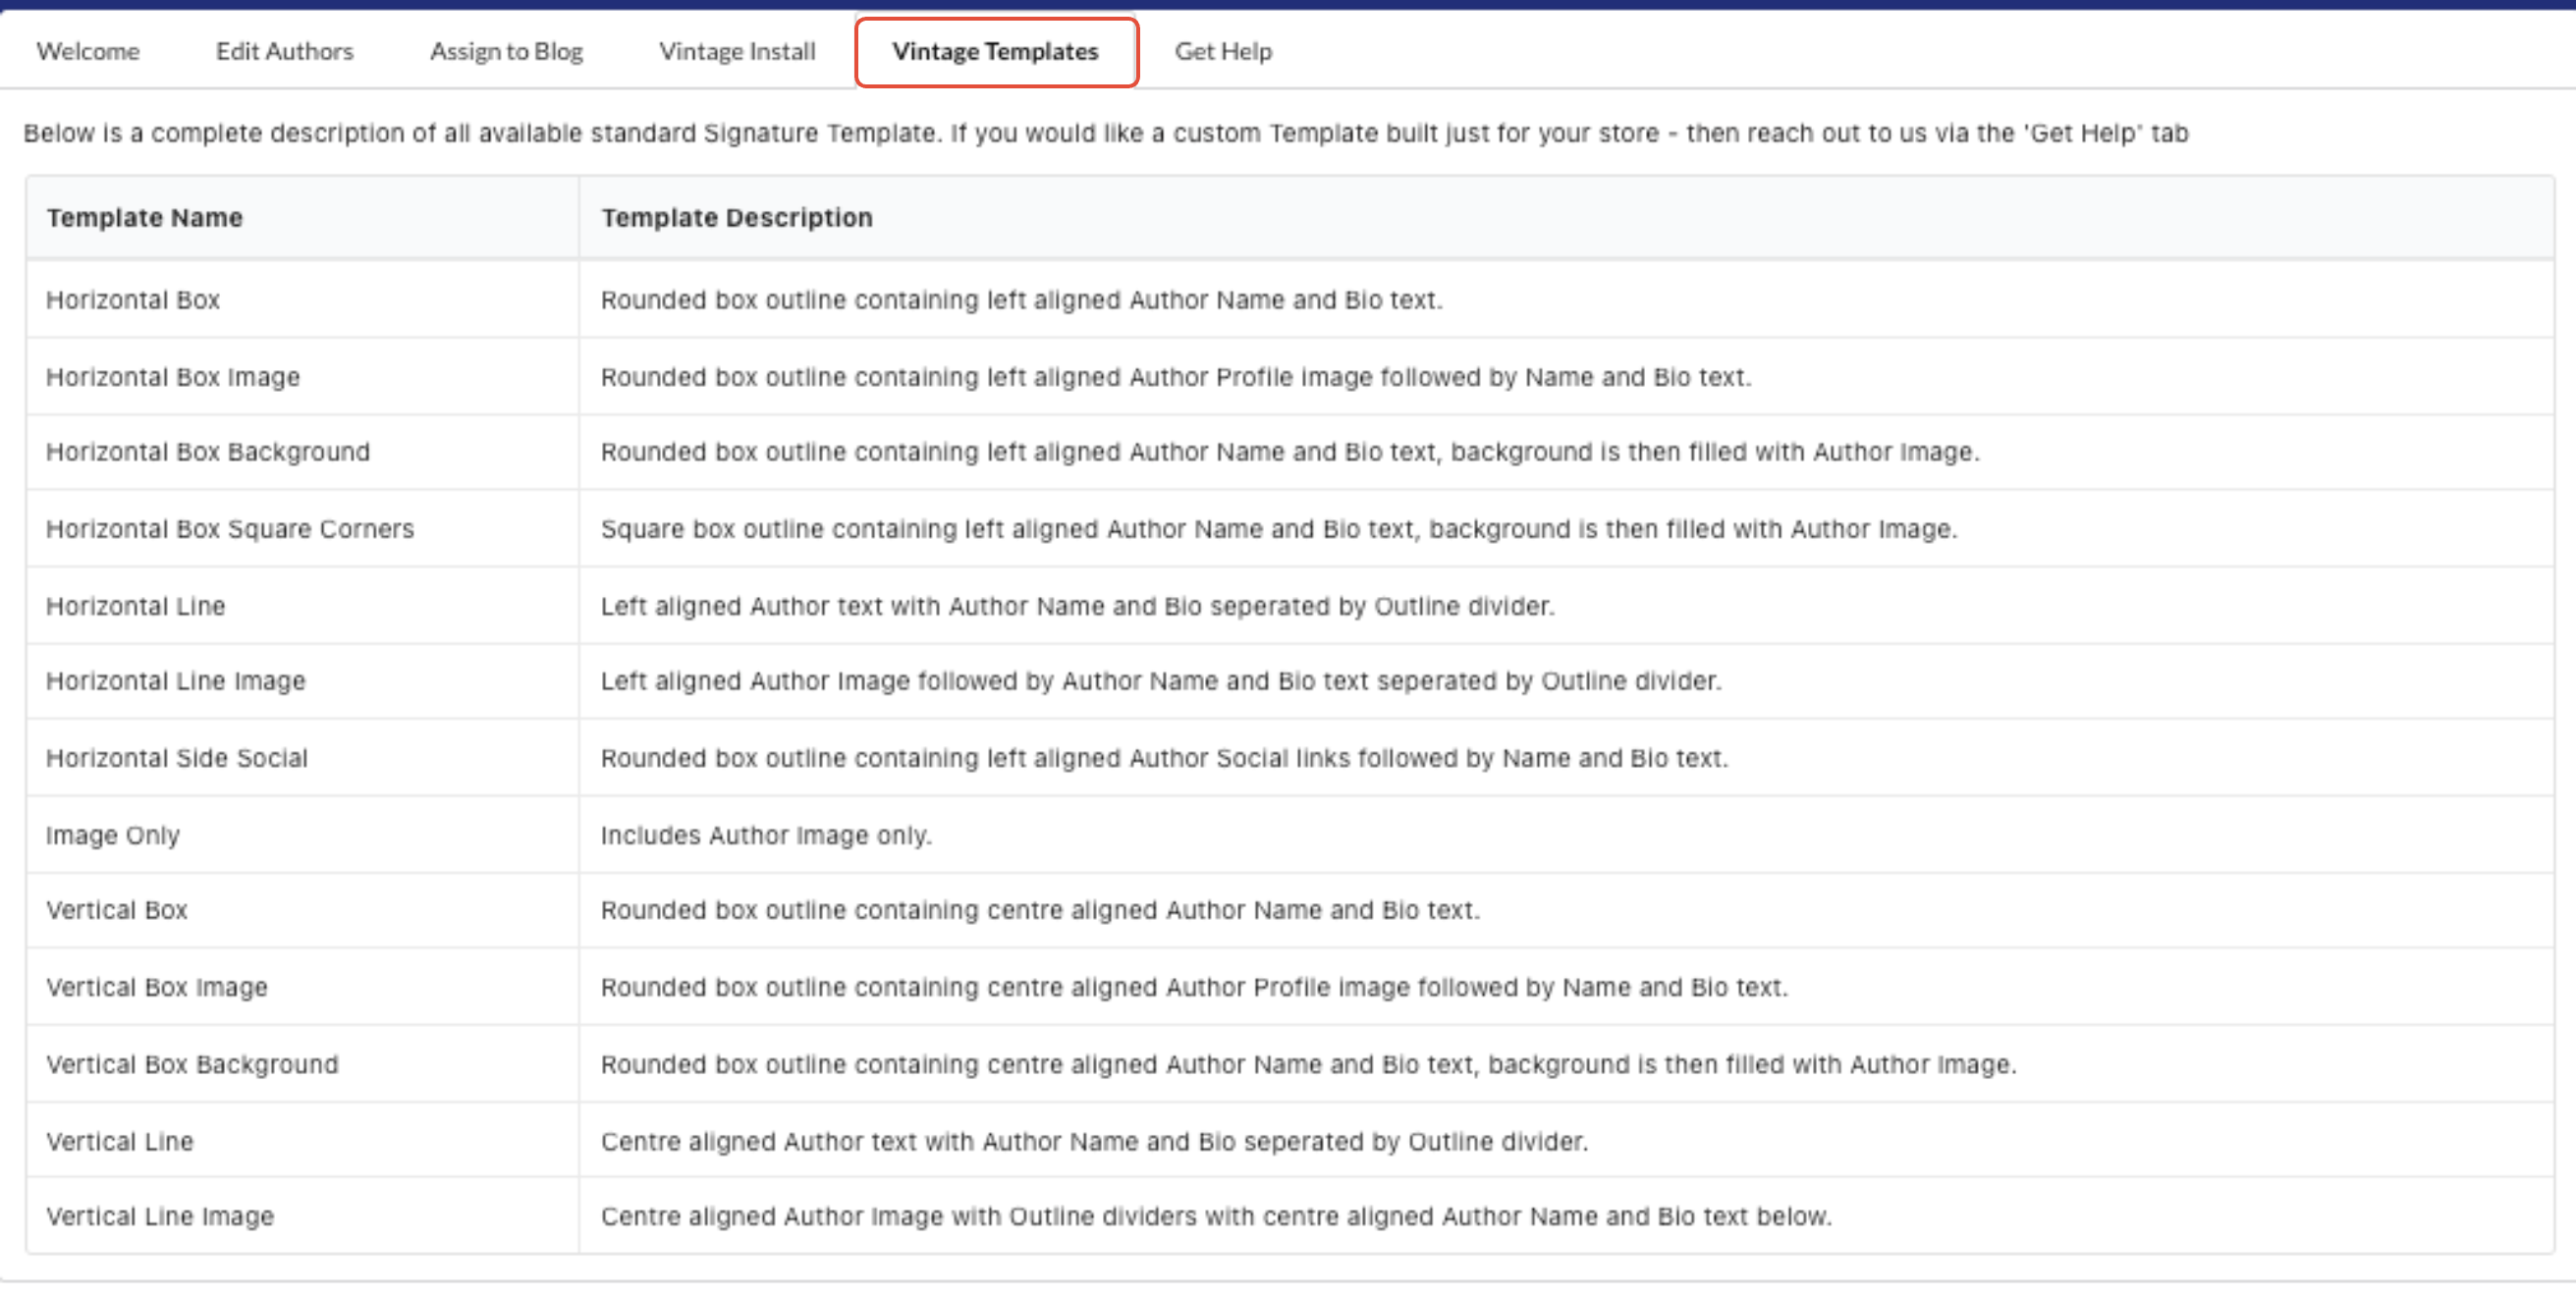
Choose a template for them and style away with all the different setting options.

For more details on the Templates - click on the 'Vintage Templates' tab.
Dont forget to Click on the 'Save' button when done!

New Guest Authors
To add new guest authors without using a precious/costly Shopify Account.
Simply type their name as you wish it to appear on your site in this field and then click on the + button.

You will now be able to Select them in the Dropdown as per the instructions in the Basics section

Assigning Authors to Blog Posts
For existing site Authors who have Shopify accounts, you dont need to do anything special.
The app will interpret they are the author and display the signature according to the styling you have set.
For guest authors without accounts - they need to be assigned to the blog post
Simply complete your blog post editing as you would normally, upload all content and set as published.
Then go into the 'Assign to Blog' tab of the app. Select the Blog (if you have multiple) and find the post in question.
The search option is helpful if you have a large numbers of posts
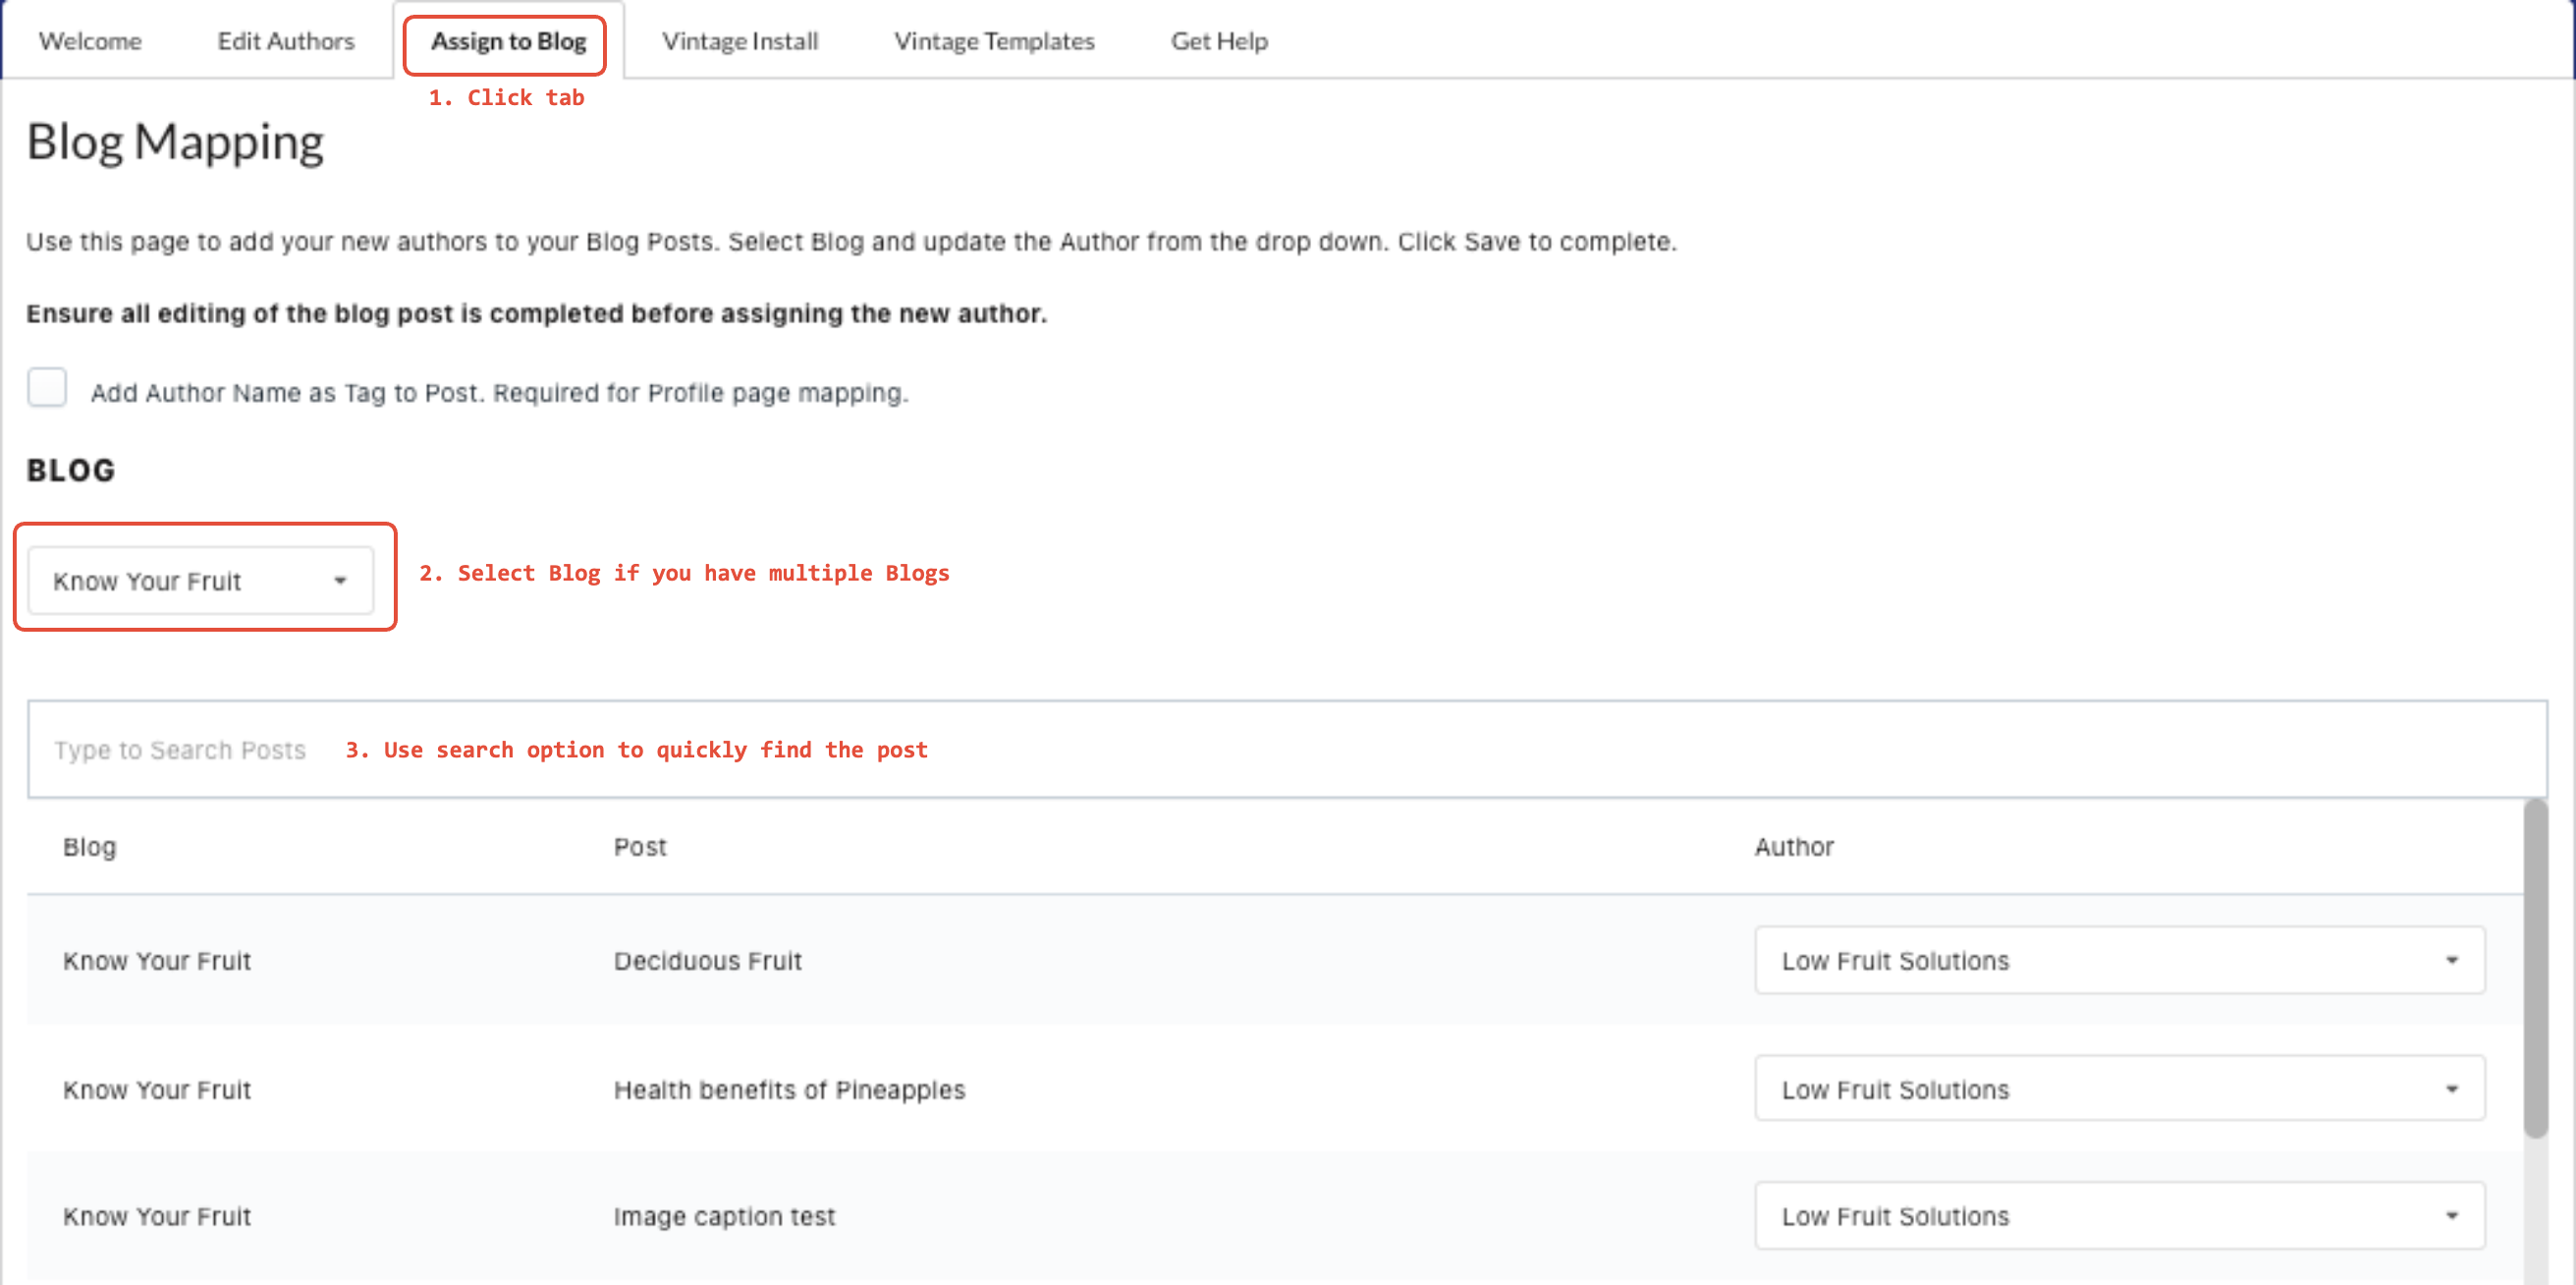
Choose the new Author from the dropdown (If not visible, then click on ‘Refresh Authors’ first)

Once the new Author has been selected. Make sure you click on ’Save’ to complete the change!

Optional
To enable Post and Blog mapping in our new application features we have included the option to also tag a blog post with the author name when assignment occurs.
Simply check this box

and a tag of the author name - in this example 'Author Name' will be created and added to the respective post.
Deleting Authors
Simply select the Author in question from the drop-down and click on the Delete button.

Note: This will only remove Authors added by the app. Authors with Shopify accounts will remain but their settings will be deleted.
